Resizing an image in Adobe Photoshop
Seven-Minute Tutorial: How to Resize an Image in Photoshop
When you need to resize an image in Adobe Photoshop for use on a website or for print output, a proper understanding of pixel resolution will help you to achieve the best possible results. In this video tutorial Platform Photoshop trainer Alex Silver demonstrates how to resize an image in Photoshop.
Video Transcript
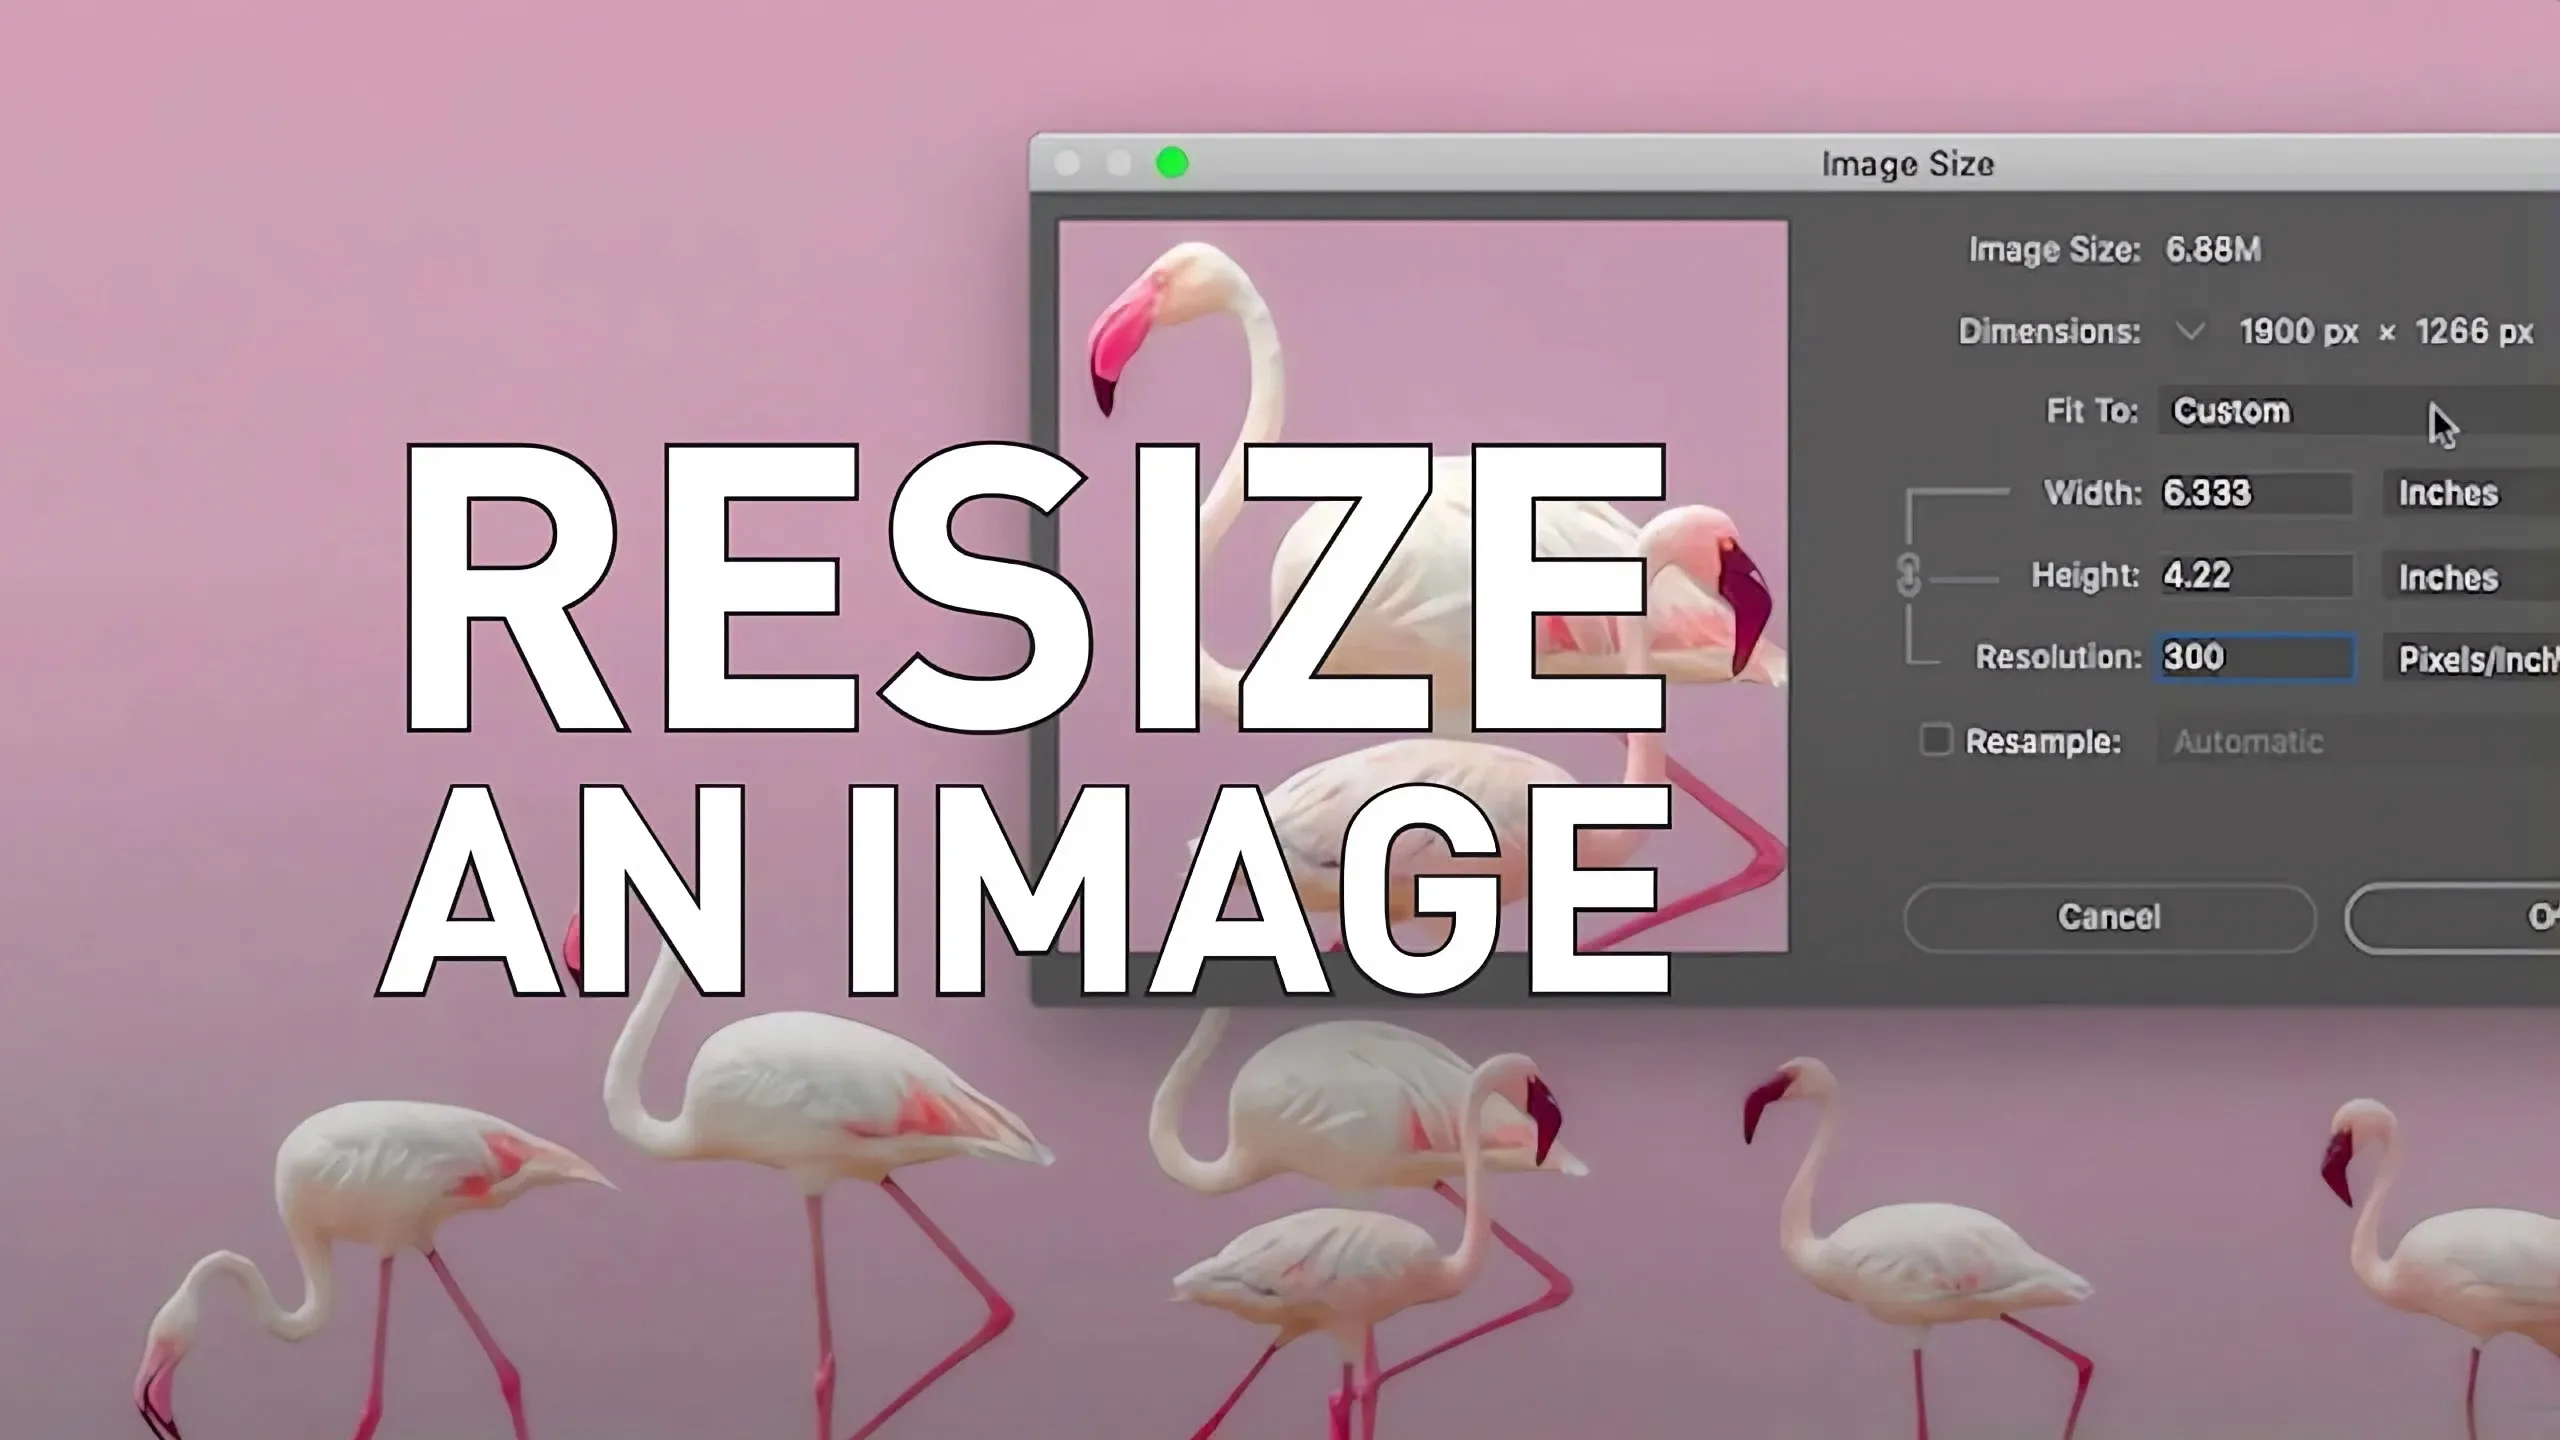
When dealing with how to resize an image in Adobe Photoshop, a photograph (which of course is just made up of pixels) one needs to know how many pixels are in the image. If I zoom in for example, you’ll see eventually all the pixels in this particular image: the little squares. But looking at the image on the computer screen doesn’t tell you how big the image is, because I can zoom in and out and it doesn’t tell you how big it will print. You need to check the pixel size and the resolution setting. We can do that very easily if I go to the ‘Image Menu’ and ‘Image Size’. Here for example it’s been set to a resolution of 300 with a dimension of 1900 pixels X 1266 pixels.
Pixel Resolution
The way it works is that the dimensions width and height divided by the resolution gives you the output width and height to the print width and height. So for example 1900 divided by 300 gives us just over six inches width and 1266 divided by 300 gives us just over four inches width.
Image File Size
The size of the image in megabytes – the file size – relates to the number of colours and the number of pixels. So the higher the number of pixels the bigger the file size for example. At the moment ‘Resample’ is off. What that means is we do not allow Photoshop to add pixels or delete pixels. So if I reduce the resolution to 72 (which is a very low quality) you can see the width and height go up quite a lot, but the dimensions – the number of pixels – do not. The preview has not changed either. If I click on ‘OK’ the image size physically on my computer screen has not zoomed in or zoomed out. Which means because photoshop is taking a pixel of the image and mapping it to a number of pixels on the computer screen – since this doesn’t change (it doesn’t zoom in or zoom out) the number of pixels has remained the same.
Using Resample
If I go back now to ‘Image’, ‘Image Size’ and if I now put ‘Resample’ on I’m now telling photoshop you may increase pixels if you wish or decrease pixels. So if I increase the resolution to 300 – about four times – you can see there the preview has zoomed in a lot. The dimensions have changed massively but the width and height have not. So what this means is we’re keeping the same output width and height, 26 odd inches X 17.5, but the resolution has increased. Therefore the number of pixels has increased a lot as well. You can see at the top the image size is a lot larger. Instead of 6.88 MB (megabytes) it’s now 119.5 MB and if I click on ‘OK’ you can see Photoshop is a little bit busy there and it’s zoomed in a lot because there are a lot more pixels for photoshop to display now. It’s now zoomed in – and if I now zoom out I can put it back to where it was, approximately – but there are a lot more pixels in the image so the file size has got bigger.
Add Or Remove Pixels?
However, just adding extra pixels does not mean the quality of the image becomes better. It just means there are more pixels – and this was a massive change. This was from 72 to 300 – about four times, so when you output this to print for example, it won’t be a fantastic quality – but it will be a bigger file size – and it may give you the results you want (or not). You’ll have to do a test print.
Resolution For Thumbnails
If I set the resolution down to say (let’s be silly) to 10 and resample is on – and you can see the preview has zoomed out – the dimensions have gone down to something tiny: 264 pixels X 176 pixels and the file size is not even 0.5 MB, from nearly 120 MB. That’s going to tell me the image is going to be very small and very rough and indeed, If I do ‘OK’ you can see we’ve zoomed out so much because there are so few pixels. If I now zoom in back to (probably) where we were before, you can now see the pixelation. Indeed, you may want to do something like this: maybe for creating a thumbnail view or something like that, but you can see now there are much fewer pixels and we get this pixelated version.
Resolution For Print
If I go to the ‘File Menu’ and revert, which reverts back to where it was, it zooms in. I’m now going to zoom out again – looks better on the screen but remember that doesn’t tell you how big it’s going to print on the output – so if I go to ‘Image’ in ‘Image Size’ I’ll take off ‘Resample’ and let’s say I’ll set the resolution to 300 pixels which is a good print output. The dimensions remain the same. The image size remains the same but the print output, the width and height, have reduced just over 6 X 4 inches. Which means for a good quality print this particular image will only give me about a 6 X 4 inch size. Of course if you want to go metric I can just choose it there – so 16 X 10 centimetres. A standard A4 page is 21 X 29.7 centimetres, so this is not even big enough for an A4 page.
Conclusion
This is how you resize an image – but you really have to understand if ‘Resample’ is on you allow photoshop to delete pixels permanently or add pixels permanently. If resample is off you can muck around with whatever numbers you wish and nothing is permanently done and you can come back tomorrow, next week next, month next year, and change it to however you want.
Always though, if you’re not sure work on a copy of the file so that if you make a mistake you still have the original.
Whenever you start doing work on an image you want as many pixels as possible. So if this image came from a camera you always want to take a photograph at the highest quality setting, which means the most number of pixels (width and height). The resolution you change – according to what you want to do in the particular job – so you don’t need to worry about the resolution it’s the number of pixels that you’re after.
View our range of Adobe authorised Photoshop Courses. Looking for private training? contact us here.
For more great videos tutorials Subscribe to the Platform Training YouTube Channel.


