How to use Clipping Masks in Photoshop
In this short tutorial we will show you how you can use Photoshop Clipping Masks to create stylish photo layouts. Once you understand how they work, clipping masks are a nice intuitive way to create interesting shapes around your images in Photoshop by using one layer to ‘clip’ what will be shown of the layer above it. Step-by-step, we’ll show you how to use clipping groups to create unique layouts – great for creating professional looking blog entries and website graphics. If you don’t yet have Adobe Photoshop you can easily download a free 7 day trial from the adobe website.
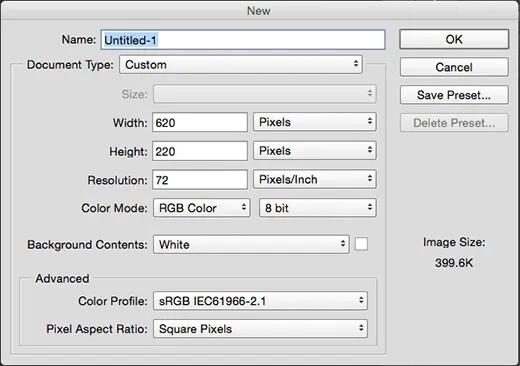
Step 1. Open up Photoshop and go to file > new. For this exercise, we have made the size 620 pixels wide by 220 pixels high, with a resolution of 72ppi.
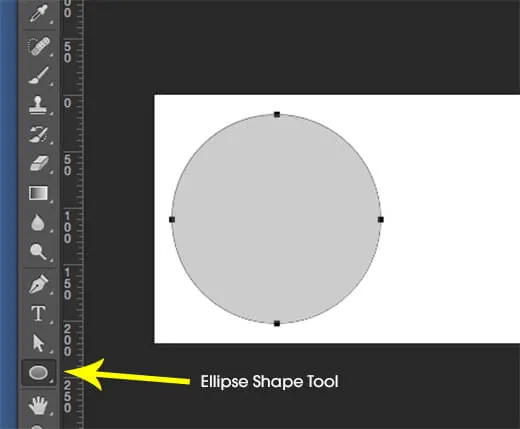
Step 2. Once the document is created, select the ellipse shape tool from the tool panel (above the hand tool, nested with the rectangle shape tool). To create a circle, hold down the shift key as a drag the shape out on the artboard.
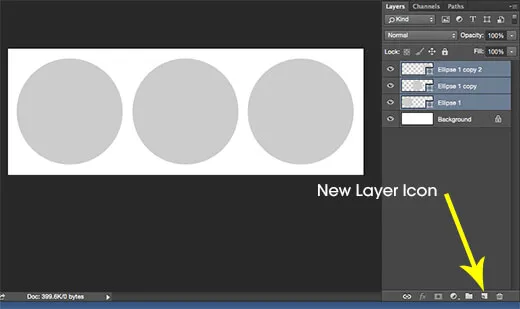
Step 3. Make a second circle by selecting the first one in the layers panel and dragging the layer over the ‘new layer’ icon at the bottom of the panel, then, using the move tool, drag the new circle so it sits next to the original one; repeat this step so you have 3 circles next to each other in the work area, one on the left, one in the middle and one on the right.
If necessary, use the smart guides which appear as you move the shapes to align them, or select them all then use the alignment controls in the options bar across the top of the work area.
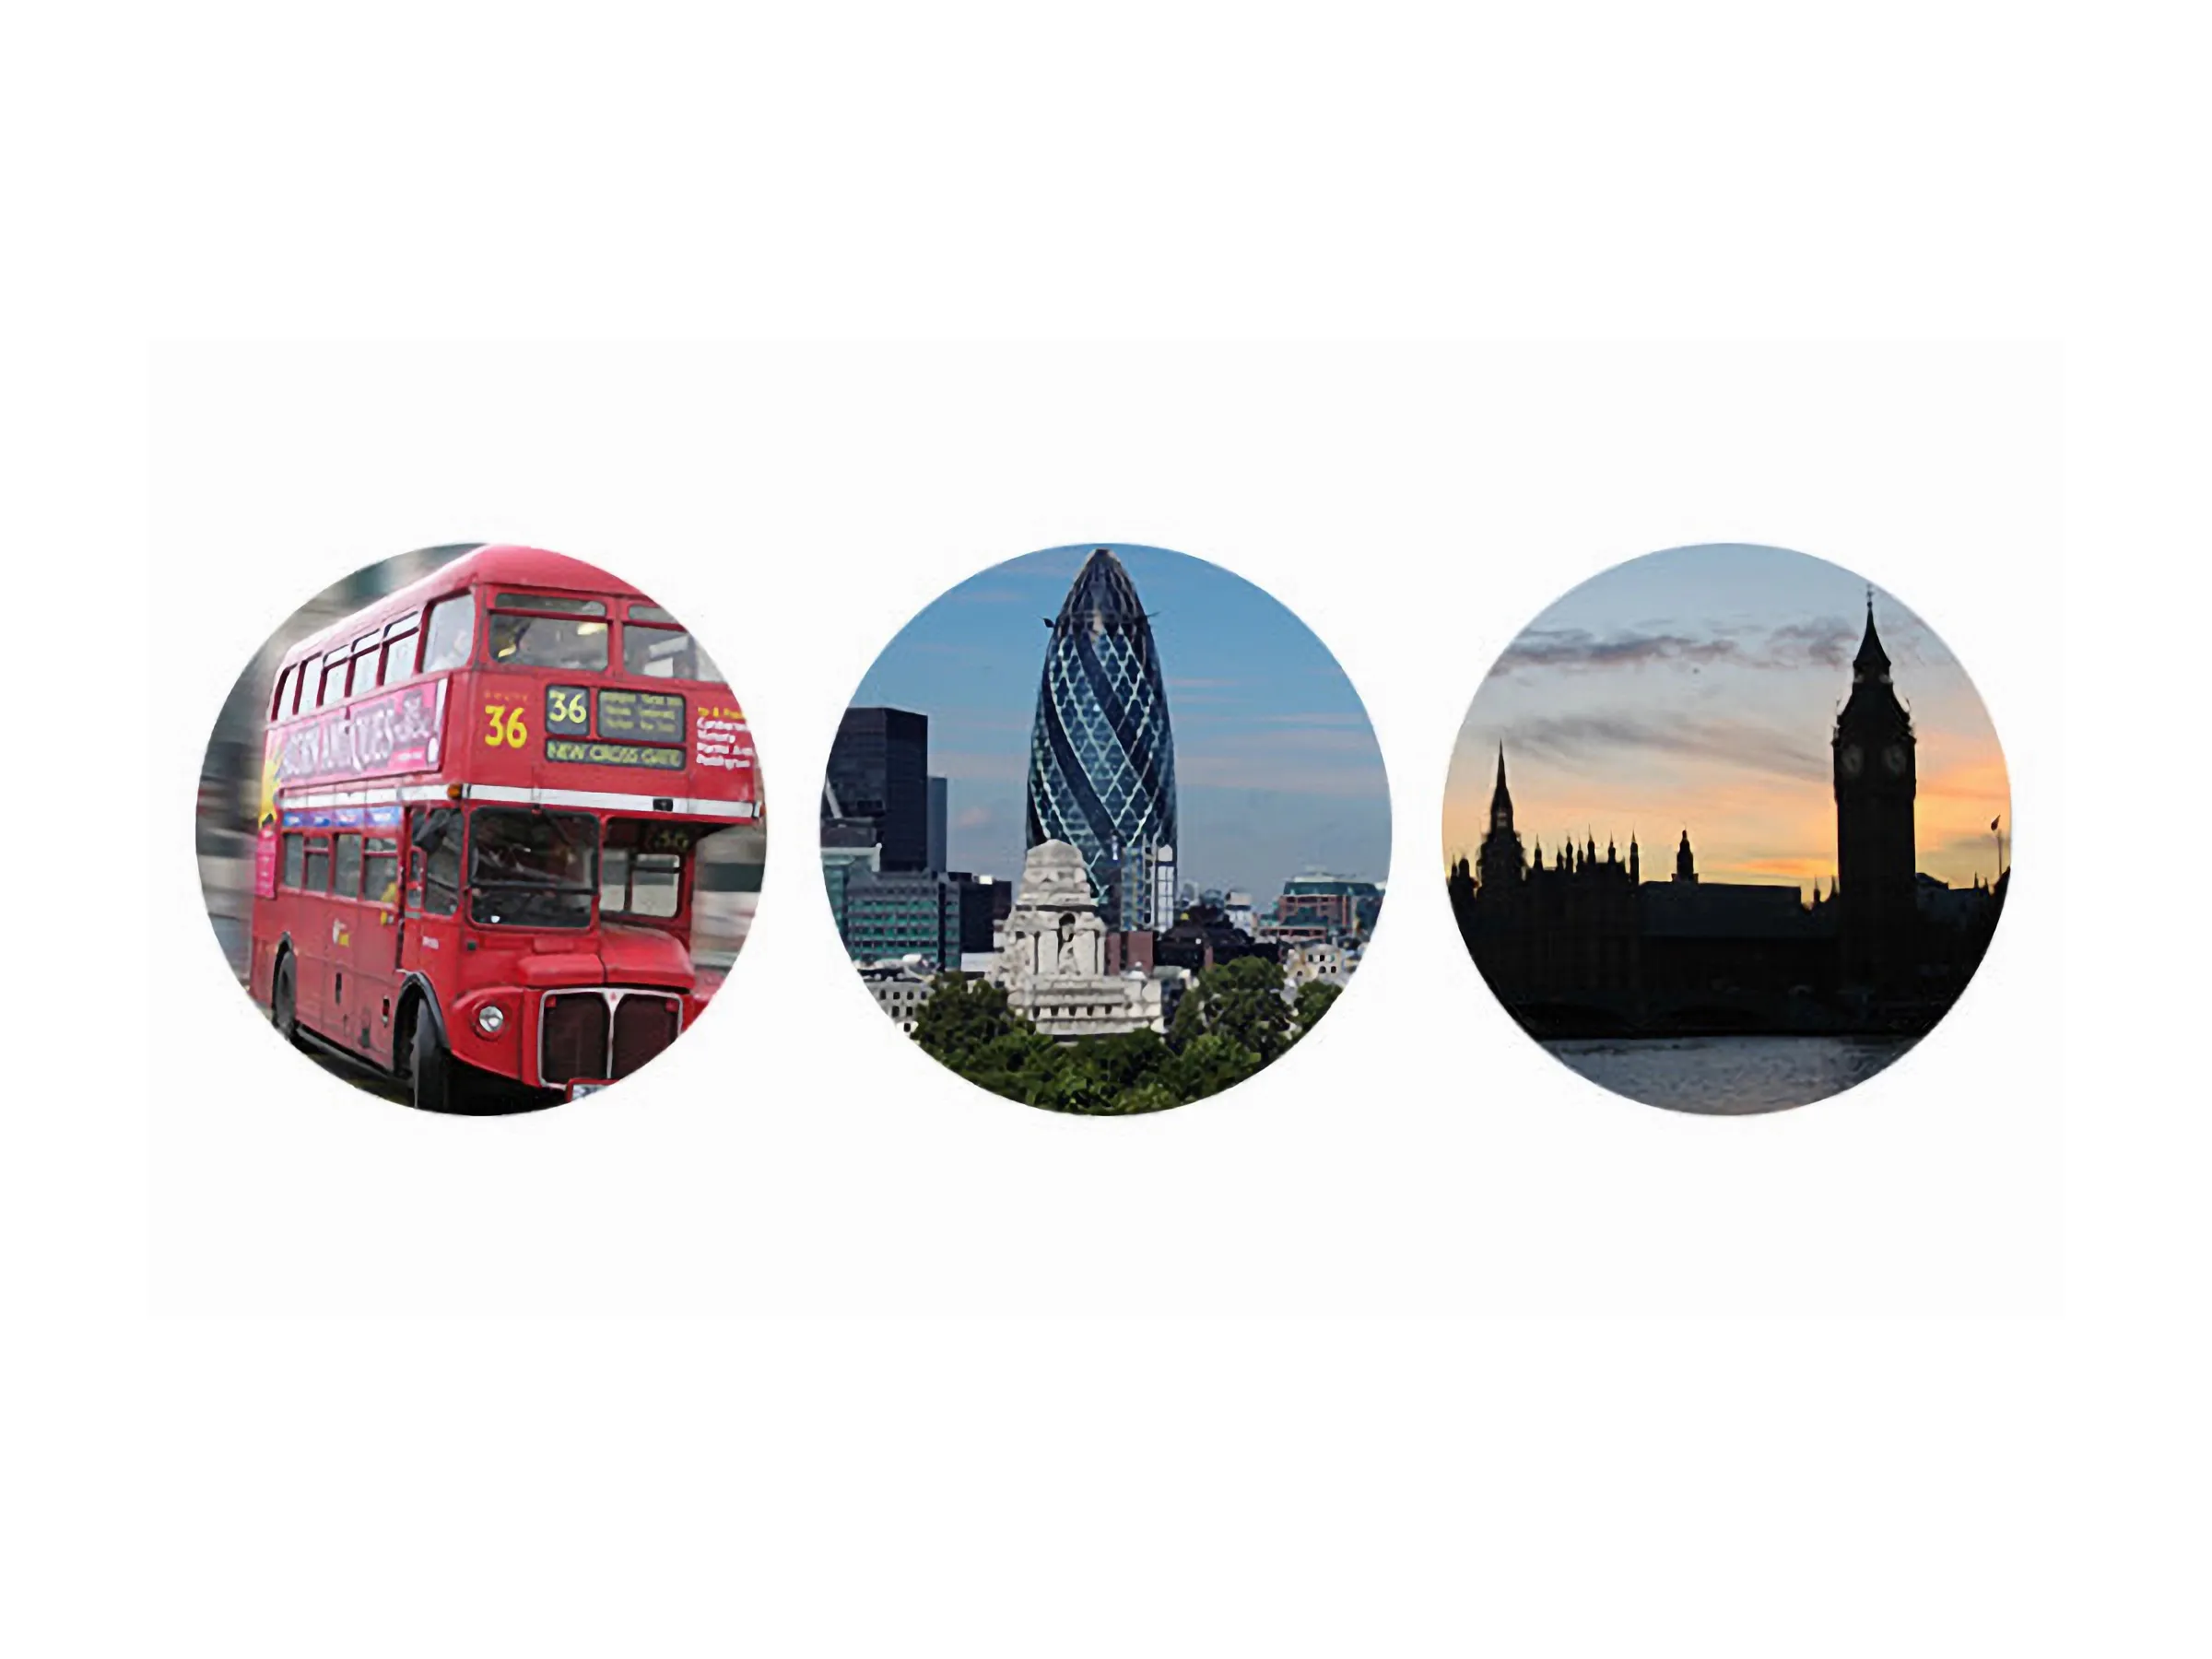
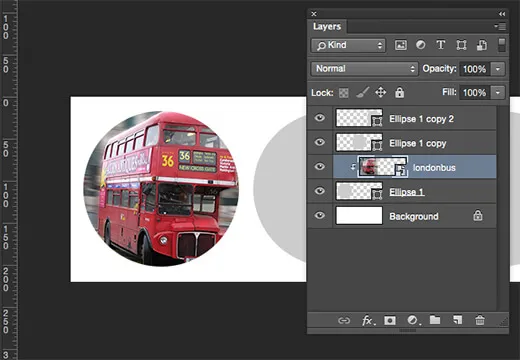
Step 4. Click on the bottom circle layer in the layers panel to select it, then drag an image file into the work area either from a folder on your computer or from Adobe Bridge. It is important that you position the image so is sitting directly above the circle whose shape you want it to fit into.
Step 5. Once the image is in place, hold down the alt/option key and place your cursor on the line between the circle layer and the image in the layers panel. The cursor will turn to a right-angled arrow with a square next to it – once that happens click on the line to clip the image to the circle beneath it.
In the layers panel, the thumbnail on the image layer will shift over to the right and will have the right-angled arrow icon next to it, which indicates that the image layer is now clipped to the circle shape.
Step 6. Select the next circle above in the layer panel and repeat step five, then repeat for the third circle, until all three circles have an image clipped to them.
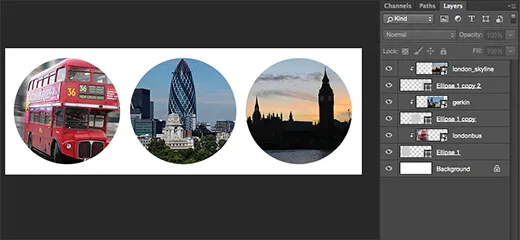
And that’s all there is to it! Don’t worry if the position of the clipped images is not quite as you want – they can be selected and moved or resized if necessary as with any other layer. If you want to release an item from it’s clipping group, simply alt-click again on the line between the layers.

For the second part of the tutorial we’ll try placing an image inside type. The method is just the same as above except that you use text as the clipping layer rather than a shape….
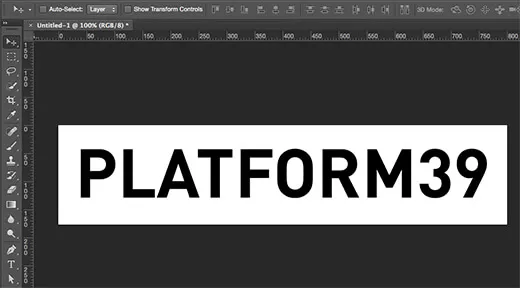
Step 1. Create a new photoshop file, then put in the text you wish to clip your image to. In this example I’m using ‘Platform’ in DINPro so the image will be obvious when clipped to the text.
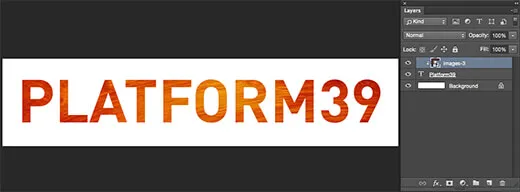
Step 2. As in step 4 above, select the type layer in the layers panel, then, from a folder or from Adobe Bridge, drag the image file you’re using into the work area; in this case I’m using an image of a rough paint texture. Resize or reposition the image as necessary to cover the text.
Step 3. Once the image is in place, hold down the alt/option key and place your cursor on the line between the text layer and the image in the layers panel. Your cursor will turn to a right-angled arrow with a square next to it – once that happens click on the line to clip the image to the type beneath it. In the layers panel, the thumbnail on the image layer will shift over to the right and will have the right-angled arrow icon next to it, which indicates that the image layer is now clipped to the text.
Step 4. To finish, I added a drop shadow by selecting the text in the layers panel and selecting ‘drop shadow’ from the fx menu at the bottom of the panel.

Learn to use Adobe Photoshop with Introductory, Intermediate and Advanced level Photoshop courses at Platform Training.