How to Add Text to Images Using Photoshop
Adding text to a photograph is really useful for your social media campaigns, in particular. Whether you want to make your posts more noticeable, you’re aiming for viral content or creating a meme, Photoshop is ideal for the job.
This tutorial will show you how to add text to photos to make images for your social media campaigns or your website.
Choose an Image
In Photoshop, open the photo you wish to use.
Select the Open menu > navigate to the image > select it > click Open
TIP: For great sources of free images, check out our earlier post
In some images, the colour and contrast may compete to much with the text, hampering legibility.
Add a Filter
Applying filters can help make text more legible.
In this example, we will add a blur filter.
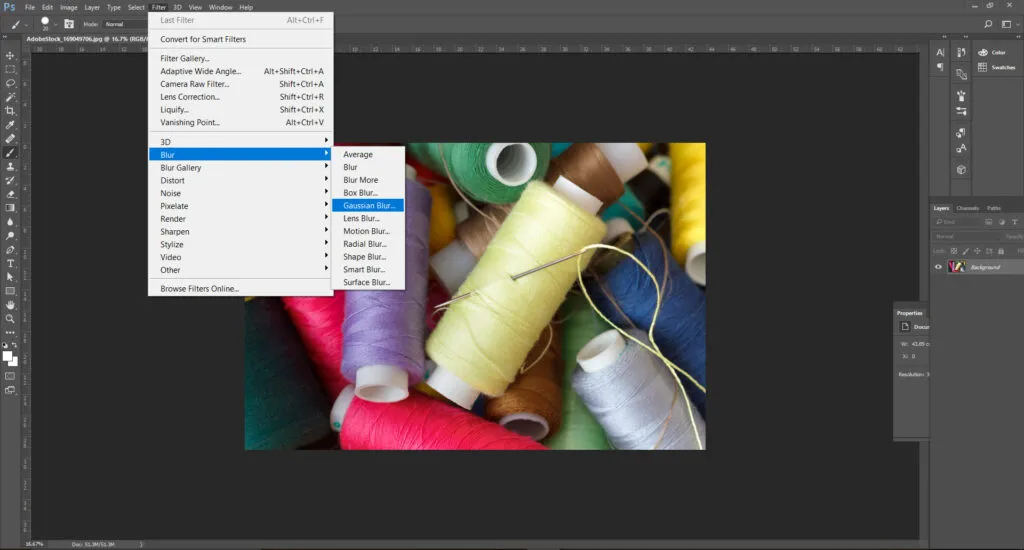
Select the Filter menu > convert to smart filters > click OK
Select the Filter menu again > select Blur > select Gaussian Blur
In the dialogue box that opens, change the Radius value to adapt the blur effect to your liking > click OK
TIP: You can use the layers panel to edit the Gaussian Blur Radius setting again later
Make Text Stand Out
Another way you can prepare the background for text, is to add a translucent shape beneath the text.
To do this, you will need to create a new layer.
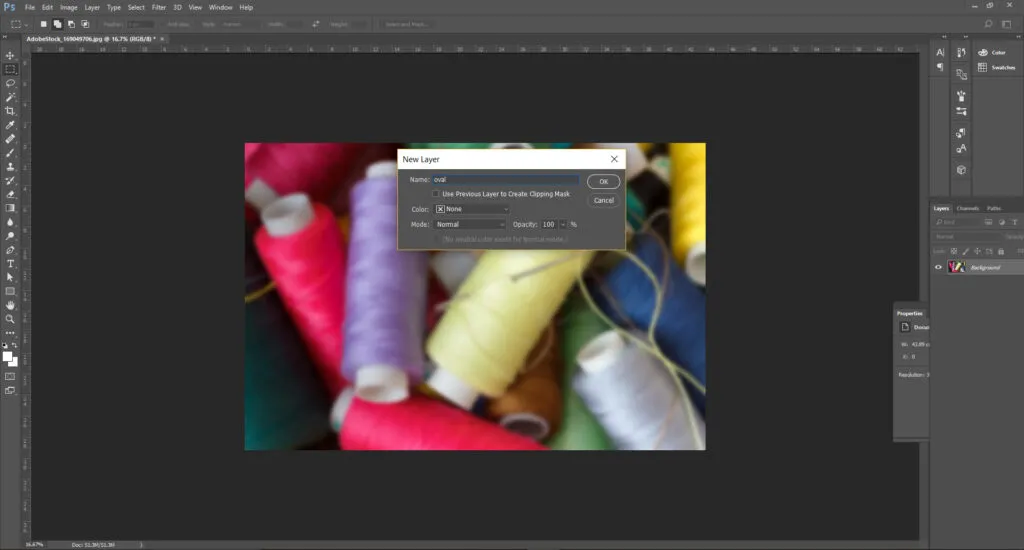
Select the Layer menu > select New > Select Layer
The New Layer dialogue will open. Name the new layer and click OK
Select a Marquee tool to create the shape you want. In this example, we are using the Elliptical Marquee tool.
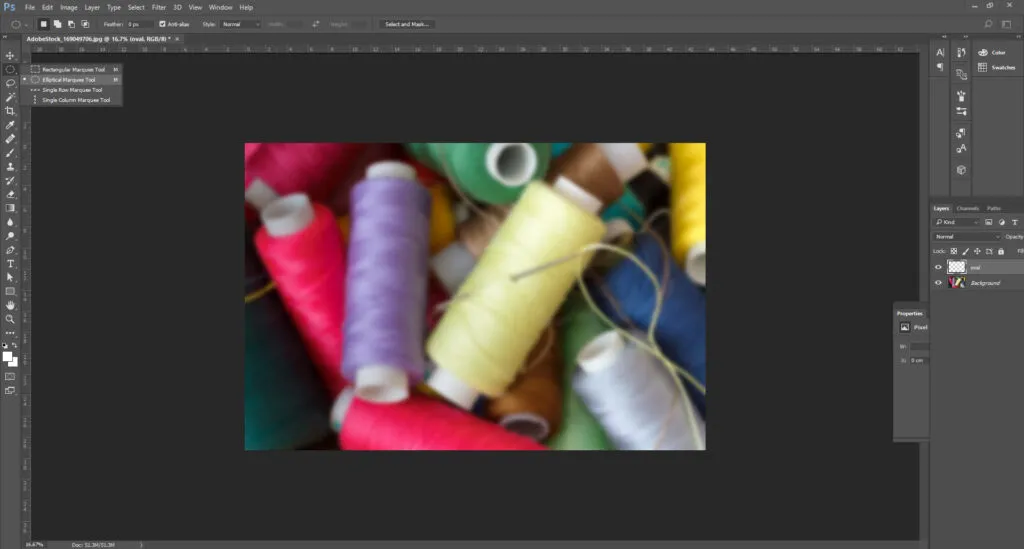
Hold the mouse key down to create the shape and size of ellipse you require.
TIP: By holding the shift key down as you create the shape, you can create a perfect circle
Select the Edit menu > select Fill
In the dialogue box that opens, choose Foreground Colour, then adjust the opacity to the desired level.
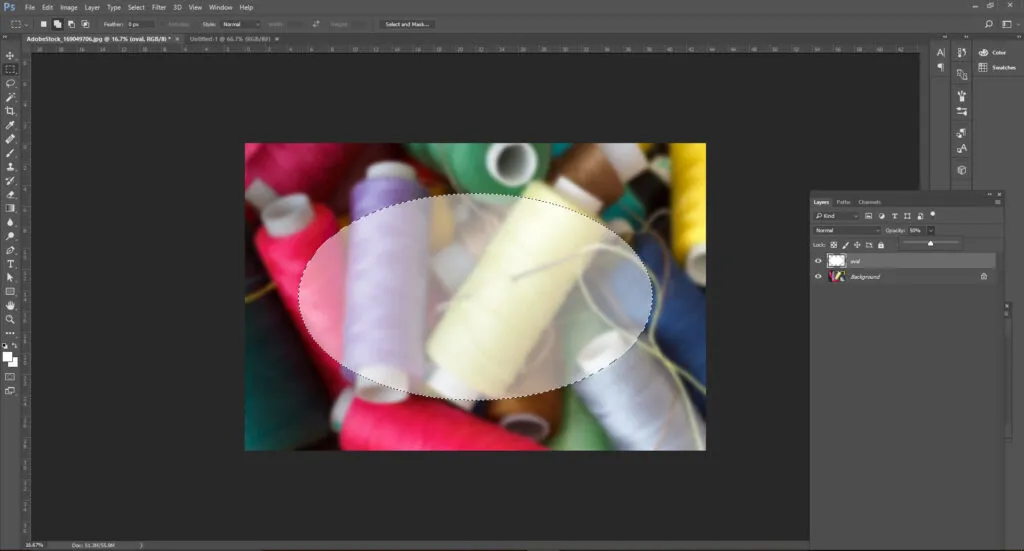
You can adjust the opacity using the Layers panel, click on the down arrow, then use the slider to adjust.
Add the Text
Now add the text.
Select the text tool. Set the font style, size and colour to the font you desire.
Click on the image and type the text you want. Adjust the justification as required.
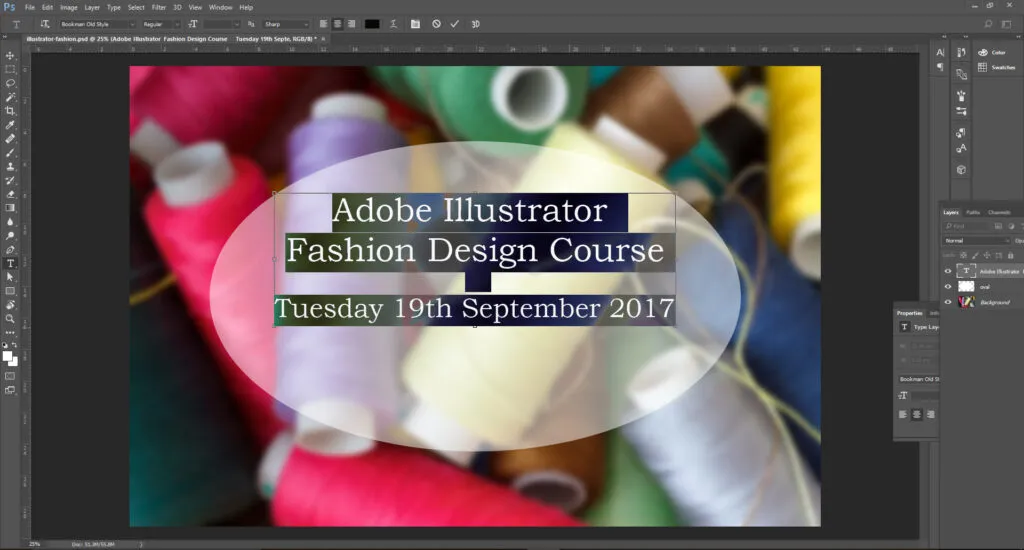
Use the move tool to position the text where it is needed.
Once you are happy with your image, you can save the image.

Save the image
First, save it in a Photoshop format with the layers visible so you can go back and edit it later if you need to.
Then you will need to save it in a format that can be used on your website or one social media. To do this, you can either save or quick export it as a .jpg or as a .png
For a comprehensive, hands-on, guide to all the essential Photoshop tools (including the text tool) book a place on our introductory level Photoshop course.